Here is a quick start guide because I am rushing to my release deadline, I will update it with a more complete manual in the next couple weeks!
Here’s the basics:
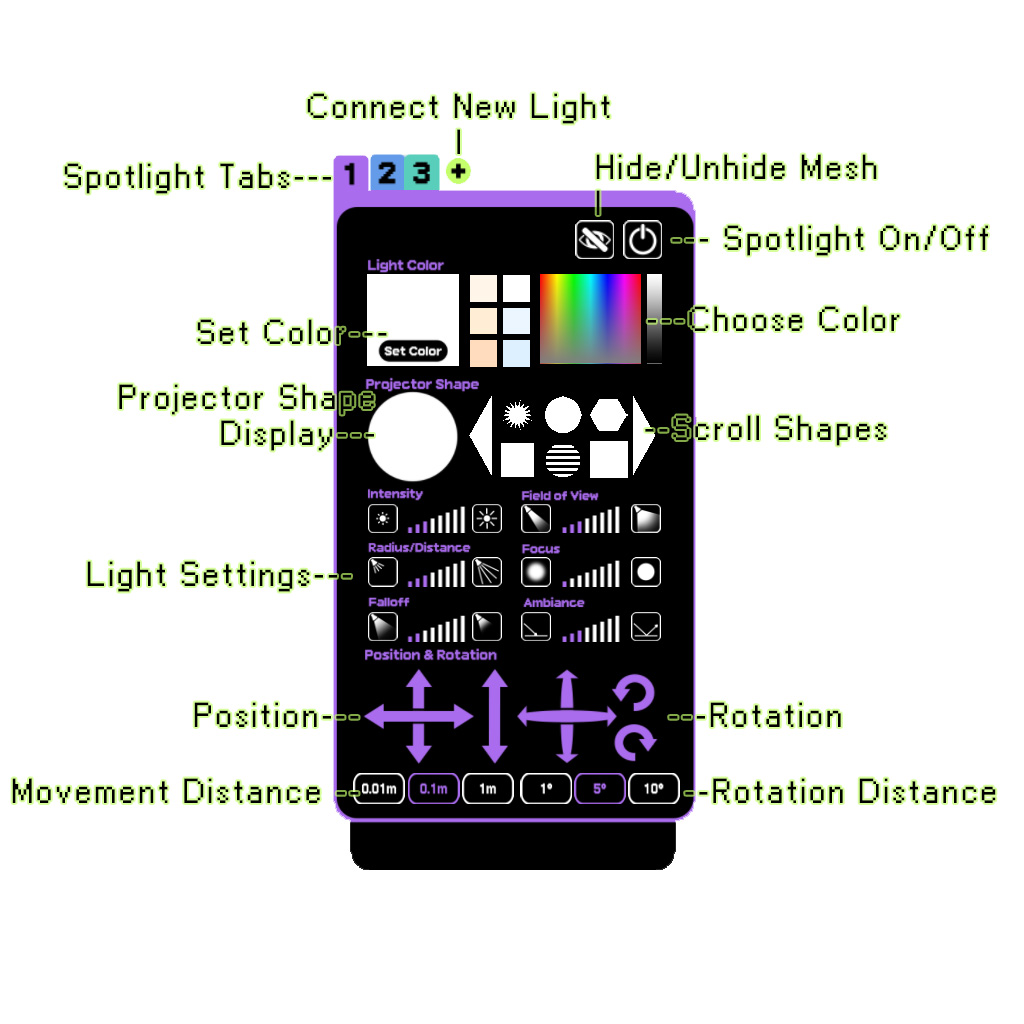
- Wear the HUD!
- Rez one or more spotlight meshes.
- Hit the “Connect New Light” button on the HUD.
- Touch the light you want to control.
- Press HUD buttons to change settings.
- To add a second (or third, fourth etc.) light, touch the + icon next to the top tab, then repeat steps 3 & 4.
- To switch between lights, just touch the tab. Lights will have color coded stripes and numbers on them to show which tab controls them.
- To add your own images to use as projectors, edit the HUD and place any fullperms image into the “Contents” tab of the HUD. They will then show up as selectable shapes in the scrolling shape list.
Here’s a quick overview of the HUD buttons: