Table of Contents
- Choosing Backdrop Version
- Setting Up:
- Basic Controls
- Menu Settings
- Adding Your Own Materials & Settings
- Troubleshooting
Choosing Which Version of the Backdrop to Use
There are two versions of the backdrop. The PBR background materials work the same on both, but the lighting settings work differently on each one:
Experience Lighting Version
- Requires the onyx.pixel experience to be allowed on the land where the backdrop is located. This can be done at the parcel or region level, it doesn’t matter who the land owner is, as long as the owner/admin allows the experience.
- Only changes the environment/lighting settings for the avatar that pressed the button. Parcel environment and other nearby avatar’s lighting/environment settings will not be changed.
- Avatars whose lighting has been changed can reset it by touching the included reset sign or teleporting away.
Parcel Lighting Version
- Requires you to own the parcel that the backdrop is on.
- Changes the environment settings for the land parcel that the backdrop is on, so all avatars on the parcel will be able to see the lighting/environment changes.
- Optionally, you may want to create a small parcel that encloses the backdrop so that only that area will have its environment settings changed.
- The backdrop can be set to only affect lighting at a certain altitude, to isolate the effect to ground level or a skybox etc.
Setting Up The Photo Studio: Parcel Lighting Version
- Optional: Create a separate parcel for the photo studio, if you want to keep the lighting changes isolated to a smaller part of your land.
- Rez and position your backdrop on the parcel.
- Optional: Set the altitude and permissions settings to allow other people to use the studio and/or restrict the lighting changes to a certain altitude (see below).
- The PBR Photo Studio is now ready to use!
Setting Up The Photo Studio: Experience Lighting Version
- Rez the photo studio.
- Allow the onyx.pixel experience on the land. This can be done at the parcel or the region level. You only need to do one of the two methods. Most people will use the parcel method, but if you own an entire region, you may use the region method to conveniently use onyx.pixel products on the whole region:
- Method 1: Adding Experience at the Parcel level:
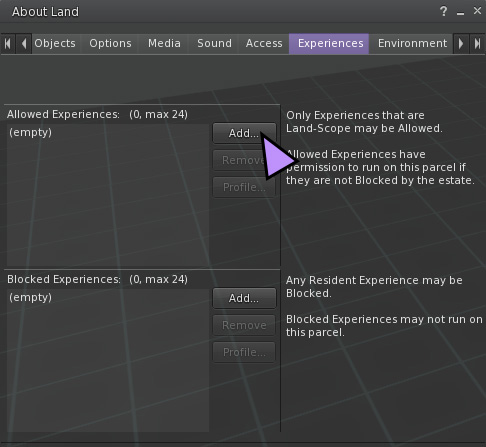
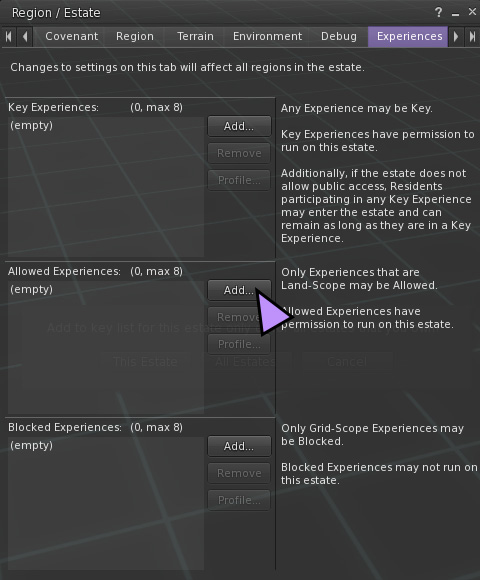
- In the In the Parcel Settings/About Land window (World->Parcel Details from the main menu), navigate to the Experiences tab. Click “Add…” next to the Allowed Experiences window.
- In the search box of the Choose Experience window that comes up, search for onyx.pixel. To make sure you have the right experience, check the details:
Name: onyx.pixel
Owner: Onyx Pixels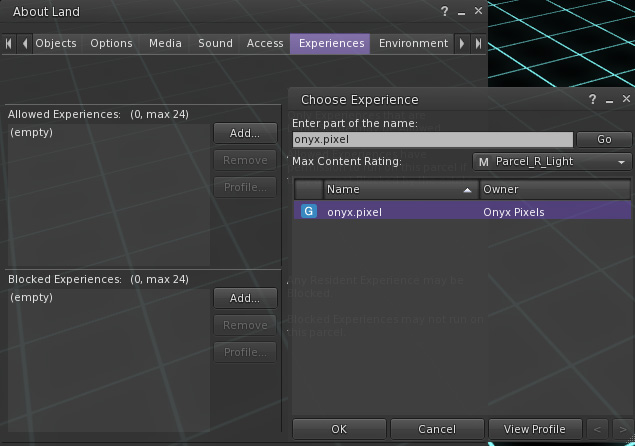
- Once you have found the onyx.pixel experience in the list, select it and press the “Ok” button at the bottom of the search window.
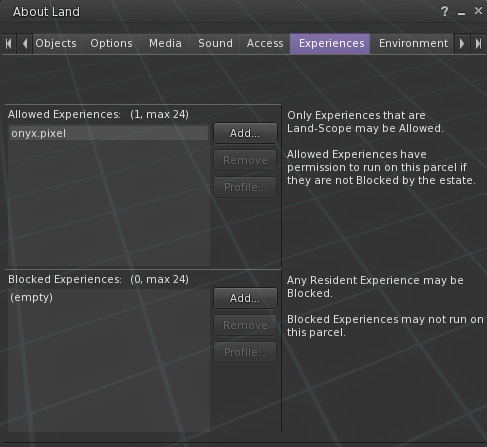
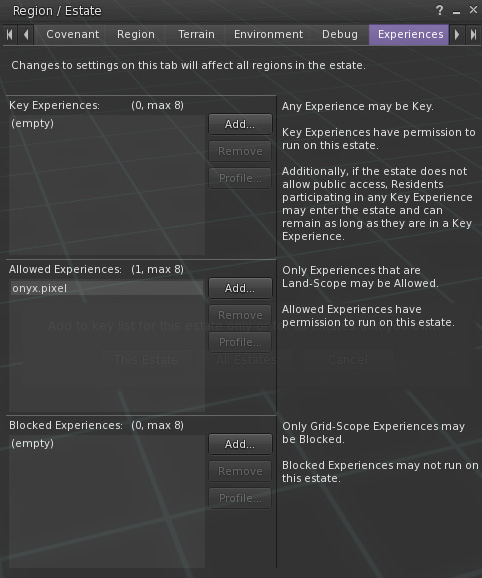
- onyx.pixel will now appear in the list of Allowed Experiences in the About Land window. Proceed to step 3!
- In the In the Parcel Settings/About Land window (World->Parcel Details from the main menu), navigate to the Experiences tab. Click “Add…” next to the Allowed Experiences window.
- Method 2: Adding Experience at the Region level:
- In the region settings (World->Region Details or Alt+R), navigate to the Experiences tab. Click “Add…” next to the Allowed Experiences window.
- In the search box in the window that comes up, search for onyx.pixel. To make sure you have the right experience, check the details:
Name: onyx.pixel
Owner: Onyx Pixels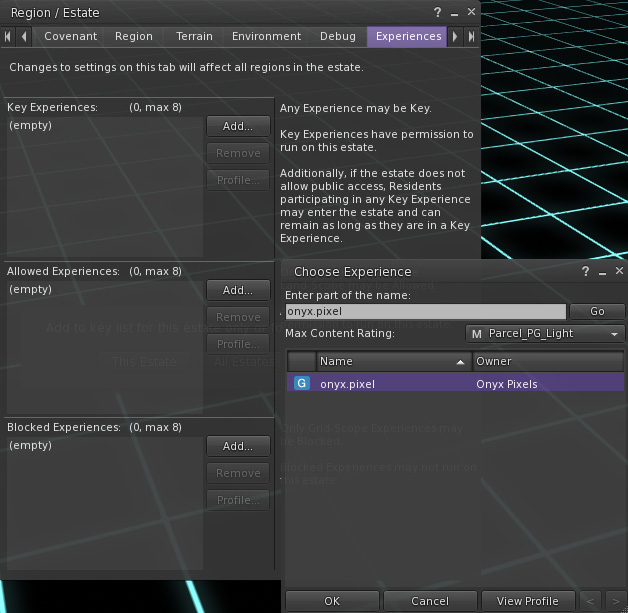
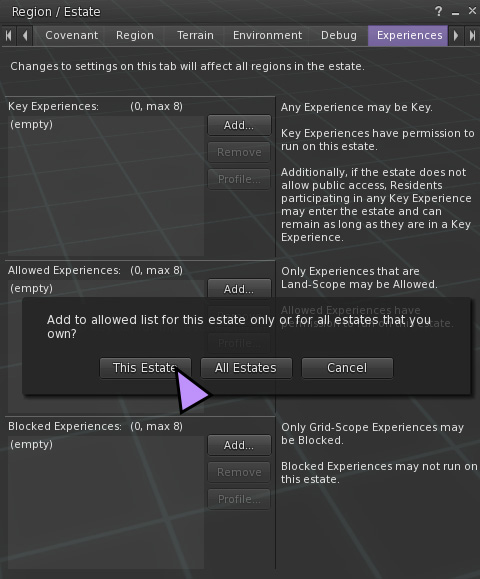
- Once you have found the onyx.pixel experience in the list that comes up, select it and press the “Ok” button at the bottom of the search window A confirmation box will pop up to ask if you want to allow the experience on This Region or All Regions. You can choose either one, but if you are an admin on other regions & you’re not sure you want to allow us everywhere, just choose “This Region”
- onyx.pixel will now appear in the list of Allowed Experiences in the Region window. Proceed to step 3!
- In the region settings (World->Region Details or Alt+R), navigate to the Experiences tab. Click “Add…” next to the Allowed Experiences window.
- Method 1: Adding Experience at the Parcel level:
- Optional: Rez a copy of “onyx.pixel – Experience Lighting Resetter” nearby to allow people to easily reset their lighting settings to their viewer settings by touching it (Settings will also reset by walking/teleporting to another region.)
- Optional: Adjust the permissions from the menu to allow other people to use the studio (see here for instructions).
- The studio is now ready for use!
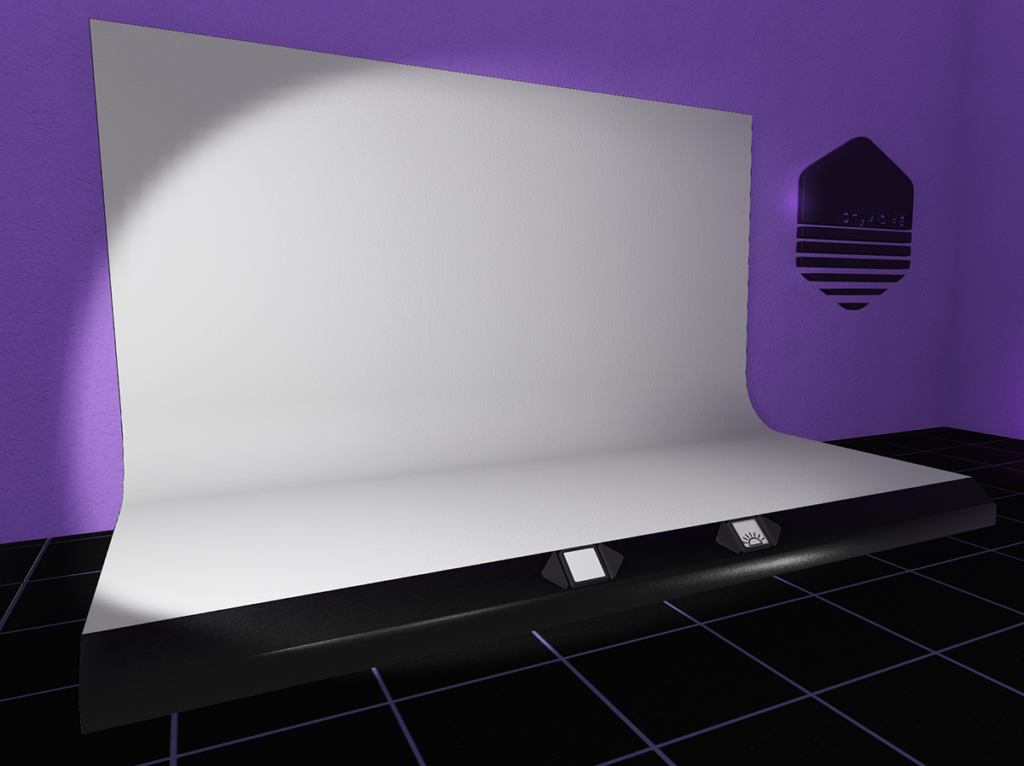
Basic Studio Controls
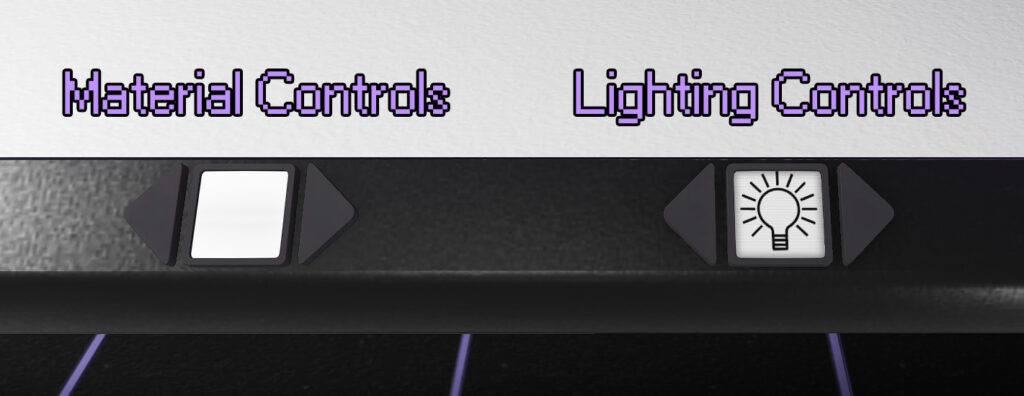
Material Controls
The left hand set of scrolling buttons control the backdrop material. The forward and back arrows cycle between all of the material objects placed inside the backdrop’s inventory (It comes with 10 backdrop materials installed, but you can also add your own!). The display between the arrow buttons has a mini version of the material being displayed on the backdrop.
Lighting Controls
The right hand set of buttons control the lighting on either the land parcel or the user’s viewer, depending on which version of the backdrop is being used. Touching the forward or back button will cycle between all of the lighting setting objects placed inside the backdrop’s inventory. The display screen between this set of buttons has an optional icon for the setting being displayed.
Menu Settings
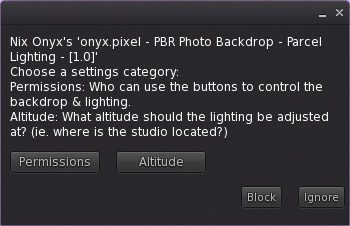
The owner of the studio can access the settings menu by touching the black base of the studio somewhere other than the control buttons. In the Parcel lighting version, that will bring up the following dialog menu (in the Experience version of the studio, it will go straight to permissions, because the altitude settings don’t apply):
Permission Settings
By default, only the owner of the studio can use the button controls to change the backdrop and lighting settings. If you would like people besides yourself to be able to change the backdrop and lighting settings, you can set it using the Permissions Settings. The options are as follows:
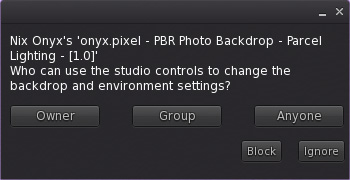
- Owner: This is the default setting. Only the owner can change the backdrop & lighting settings.
- Group: This will allow anyone who is in the same group as the backdrop to use the controls and change the settings. They must have their group tag for the proper group active in order to do so.
- Anyone: This will allow all users to use the controls on the backdrop to change the settings. Please use this setting with caution on the Parcel version of the backdrop as it will allow anyone to change the lighting for the entire parcel that the backdrop is rezzed on!
Altitude Settings
By default, the lighting environment is changed on all altitudes on the parcel, but if you would rather isolate the lighting changes to a certain altitude for a skybox (or to avoid a skybox), you can set it with the Altitude menu. The options are as follows:
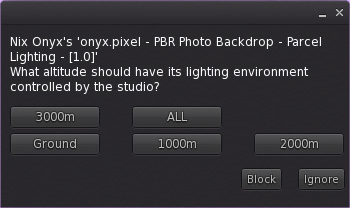
- Ground – changes the lighting from ground to 999m.
- 1000m – from 1000m-1999m
- 2000m – from 2000m-2999m
- 3000m – from 3000m up.
- ALL – changes the lighting at all levels on the parcel.
Please note that even with the changes limited to a certain altitude, sometimes the lighting can briefly shift or cycle on other altitudes when the lighting is changed. The lighting settings will return to the same settings after the shift, however.
Adding Your Own Materials & Lighting Settings
You can add more materials and lighting settings by just dragging them into the contents of the backdrop. Please note that only material objects – NOT textures – will be displayed on the backdrop.
To add new materials:
- Right click the backdrop and choose edit.
- Drag materials from your inventory into the Content tab of the edit window.
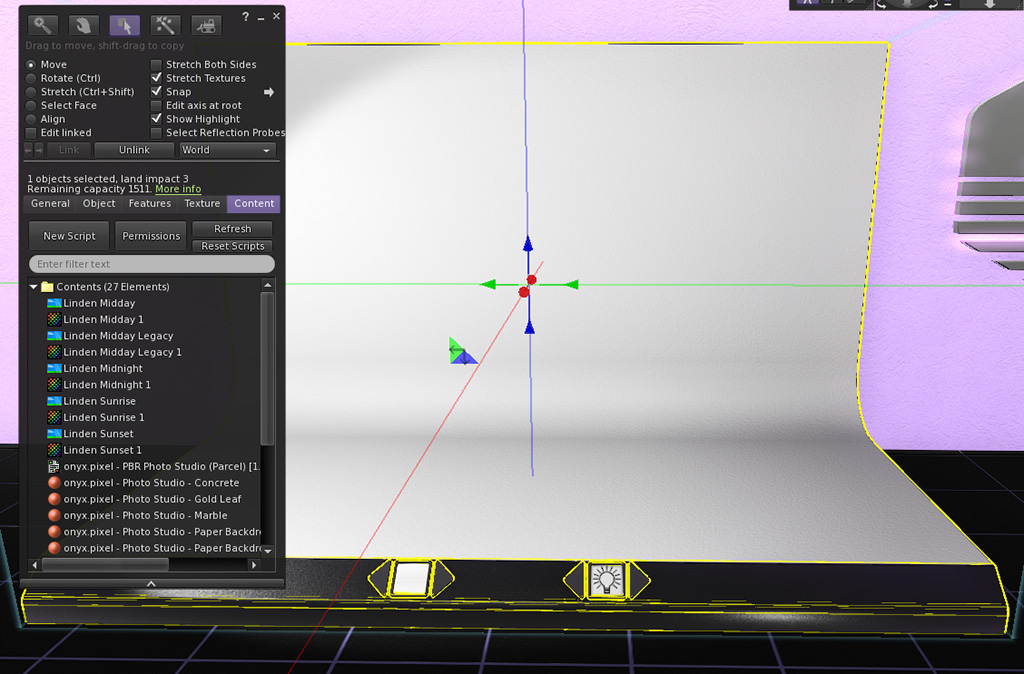
To add new lighting settings:
- Right click the backdrop and choose edit.
- Drag lighting setting from your inventory into the Content tab of the edit window.
- (Optional) Drag a texture of your desired icon from your inventory with the same name as the lighting setting into the Content tab of the edit window. (The texture will get a number appended to it by the system, but you can ignore that!)
Materials will automatically display on the little screen between the scrolling buttons when added but if you would like a custom icon for a lighting setting, you’ll need to add the texture for it. The texture needs to have the same name as a lighting setting when placed into the backdrop inventory, and then it will show up as the icon in the display for that setting. If there is no texture added that has the same name as a given setting, the screen will just display a ? icon but it will still work completely normally otherwise!
Troubleshooting
(This section is under construction, more will be added soon!)
| Problem | Possible Solution |
| Lighting changes are not visible to a certain avatar (on either version). | Make sure the avatar in question has their viewer lighting settings set to shared. The following option should have a checkmarck next to it: World->Environment->Use Shared Environment |